New aerobar set up for the Cervelo P3C - Part 1
In which I do yet another bout of TT bike fettling, this time to address the front end clutter.
The (possibly mad) plan for the P3C handlebar
Some months ago, I’d bought a secondhand 3T Aduro base bar (the same as came with the P5-Six). The original intention had been to replace the base bar on the P5. Unfortunately the four bolts holding the low extension/armpad mount to the replacement base bar were themselves seized. This appears to be a bit of a problem with these bars - my P5 has a set of Aduro bars in the low position, and one of the four screws holding the stem top plate was seized and I was never able to extract it.
So I put the base bar to one side for a while. Then I came up with a madcap plan to overhaul the front end of my venerable Cervelo P3C.
This project follows the 2014 remodelling where I installed a Zipp Vukabull base bar and Deda GCB extensions (followed rapidly by a restoration of the USE Tula while in Normandy for the 2014 Duo Normand), and the 2018 remodelling when I installed SRAM eTap shifters and Magura RT6 hydraulic brakes.
In the time since I last tinkered with the P3C, the amount of handlebar clutter has increased. Not only does my stem/bar have to accommodate my Garmin Edge computer, but also the eTap blipbox and a front light that is now mandated by CTT regulations. Alongside these changes, I had been playing around with adding risers under my elbow pads - and these felt pretty ricketty to me. I’d recently been thinking it would be time for a change.
Plan
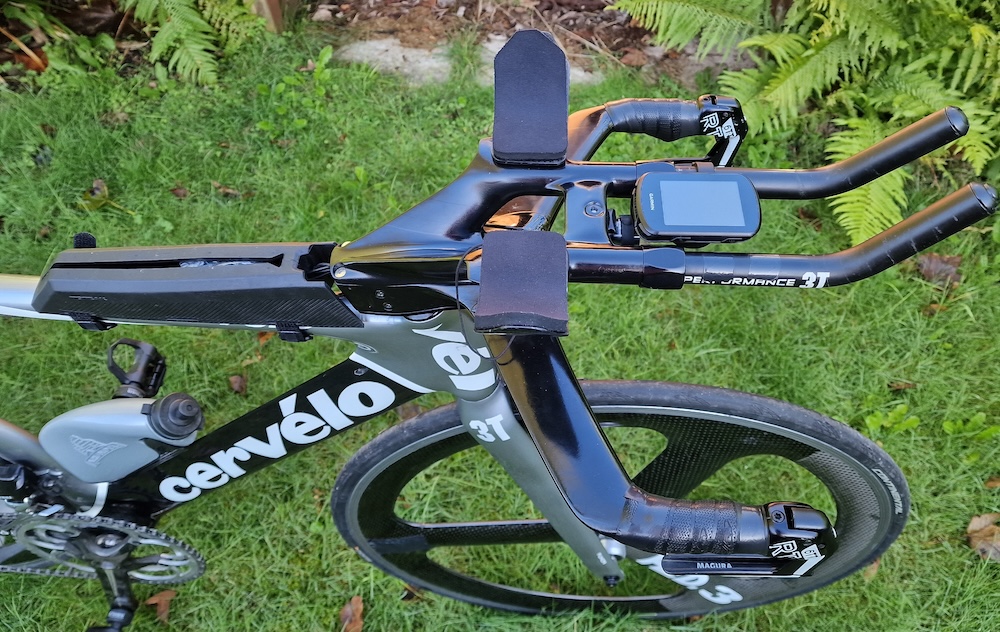
The plan was to retro-fit the spare 3T Aduro base bar to my Cervelo P3C to clean up the front end. I planned to install the high mount fitting instead of the ricketty risers. This would have the added benefit of routing all the eTap cables inside the Aduro aerobars. I would need to tuck the eTap blipbox out of the way - perhaps in a top tube storage pack.
Preparation
Before I could address any of this, I needed to get those four seized bolts out of the base bar. These bolts hold the low extension/elbow cup section to the base bar. This took quite a bit of effort, expended over several days. Two bolts came out after drilling and using screw extractors - I had to use a big electric drill in reverse, and I found a set of titanium nitride coated drill bits to be helpful in drilling the pilot hole. The other two bolts were a different matter - I ended up having to drill out the heads of the bolts. The remaining stumps were reasonably easy to remove using a vice to clamp them.
I felt that the Aduro's matt black finish with red and white stripes wouldn't look so good on the P3C, which has a gloss silver/black finish with white logos, so I planned to respray the bars with gloss paint. After lightly roughening the existing finish, I sprayed the bars with thin coats of Hycote car paint. The paint finish I ended up with wasn’t too good…but it will do. The bars have a semi-gloss finish.
I ordered TT bar Garmin locking mount that fits the Garmin quite low between the aerobar extensions, and a Topeak top tube storage box from Amazon. The Topeak storage box is made from fairly rigid plastic with a slot rather than a zip.
Removal of the brake levers and eTap switches from the existing handlebar arrangement was pretty straightforward. Care needs to be taken when removing the RT6 levers because the expander parts have tendency to fly off into the furthest nooks and crannies of the workshop.
Execution
The rebuild project was always going to be a bit involved, because of the Magura TT6 rim brakes I use. Plus of course, the rewiring/routing of the eTap switch wires. Incidentally, one thing I have found over the years is that routing the eTap wires is best done before inserting the brake hoses. Also the Park Tool internal cable routing kit is invaluable for this - there are a few versions of this kit but the one I have is the IR 1.2.
Removal of the old stem and bars was straightforward. Fitting the Aduro base bar was similarly straightforward, though it needed a spacer underneath. Then the base bar eTap blips were fitted. One of these has become a bit erratic over the last few months, sometimes working, sometimes not, so I will probably need to address this in the future.
The brake levers, hoses and brakes were refitted, but not filled with oil at this stage. Despite measuring it several times, I cut the rear brake hose a little too short. Time will tell if I have to replace it.
Fit extensions and clics. The original plan was to transfer the USE extensions from the previous build, but these did not fit the Aduro at the first attempt, possibly due to paint build up. I fitted the Aduro extensions for the time being, but broke one of the clics removing it from the USE extension (it still works). I could replace this with a momentary switch I have kicking around. I could also re-cable the blips and clics as I did for the P5 (might be necessary for enough cable length to reach the bento box).
Fit arm rests. These are my original USE Tula carbon ones - they needed a bit of hole enlargement. Cue the Dremel!
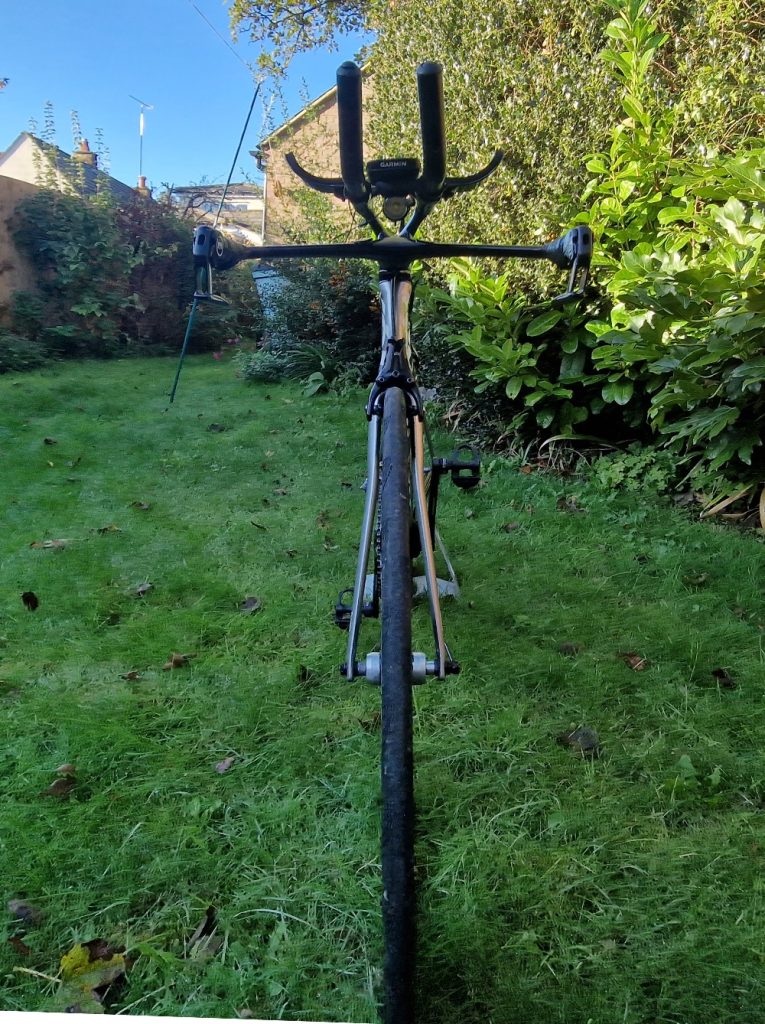
Fit a Garmin mount. I decided to use the locking TT bar Garmin mount, which works really well, with a very secure latch fitting. It keeps the Garmin quite low and between the extensions.
Bleed/Fill brakes with oil. This is pretty straightforward (Magura have a helpful video on YouTube), though as noted it's likely I'll need to replace the rear hose with a longer one.
Tape bars - I used Lizard Skin bar tape, base bars only. It's pretty grippy stuff with decent cushioning.
Fitting a front light. I really wanted to use the Apace Illuma ZT3000 USB Rechargeable Bike Headlight in my parts box, which would mount very aero. I tried but could get it to fit reliably, and I reverted to using an Exposure Trace.
Fitted top tube box. I fitted the Topeak top tube storage box to hold the blipbox, spares etc. This was reasonably straightforward. Drilled a hole in the front of the box through which the eTap wires pass. Stuck down the protective tape. The mounting straps seem to work well, but need trimming.
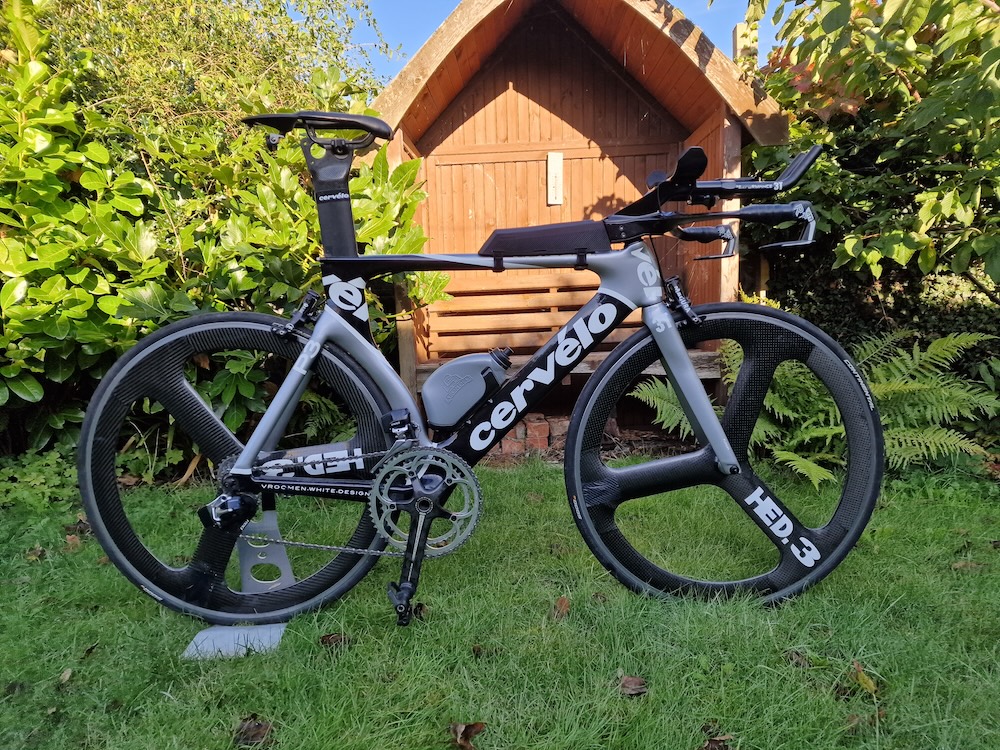
The end result
The bike is looking pretty sleek! However, the proof will be in a serious ride and since I carried out these modifications a combination of poor weather and a nasty head cold have prevented a trial run.
I have a few further modifications to the extensions and wiring of the clics and blips for gear control.
When you subscribe to the blog, we will send you an e-mail when there are new updates on the site so you wouldn't miss them.
Comments